Yes, you may be banned. If a ban is applied, you will permanently lose access to LPS Editor and any software or games developed by Xenoame. A ban may occur if you attempt to or successfully manipulate currencies, virtual storage, or any systems that provide benefits beyond those explicitly permitted by your account tier.
- Overview
- Pricing
- Pixelator
- Store
- Export
LPS Editor
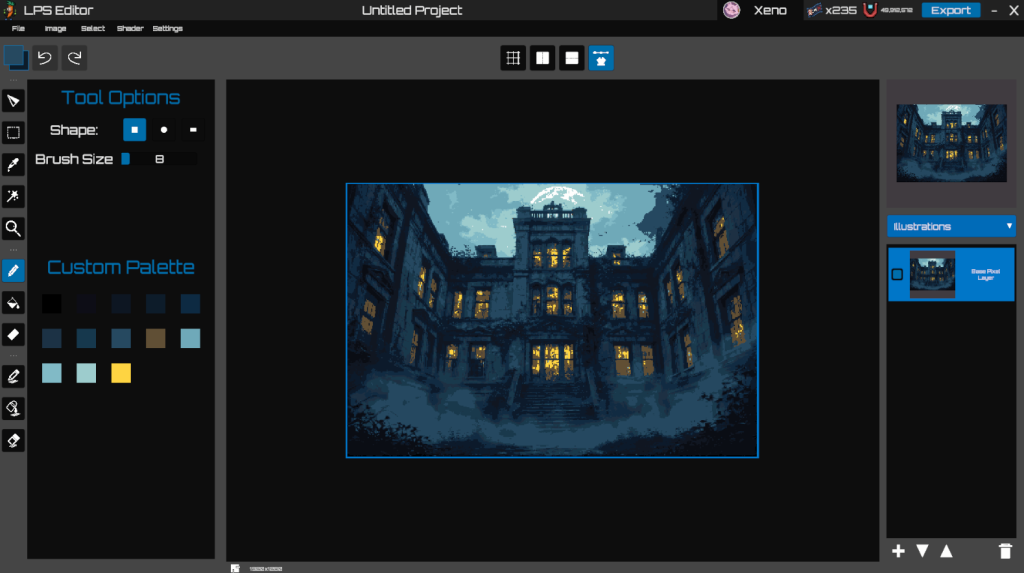
LPS Editor is a powerful, intuitive editor designed for precision and creative control. Featuring dynamic shading tools, on-point pixel drawing, full layer support, and flexible export options with integrated EGU support, it is the ideal solution for game developers and creators who demand clean, consistent, and high-quality pixel art.
But LPS Editor is not limited to pixel art. Its advanced image enhancer can elevate non-pixel artwork, transforming it into beautifully refined, stylized pieces. The smart palette retriever extracts and optimizes color palettes from any image, while the image-to-image converter generates detailed pixel art effortlessly.
With EGU integration, LPS Editor can output images or videos at up to 8K resolution, efficiently handling projects even on systems with limited VRAM. Whether you are designing games, digital illustrations, or experimenting with creative workflows, LPS Editor provides a comprehensive, versatile toolkit to bring your vision to life.

Pixelator
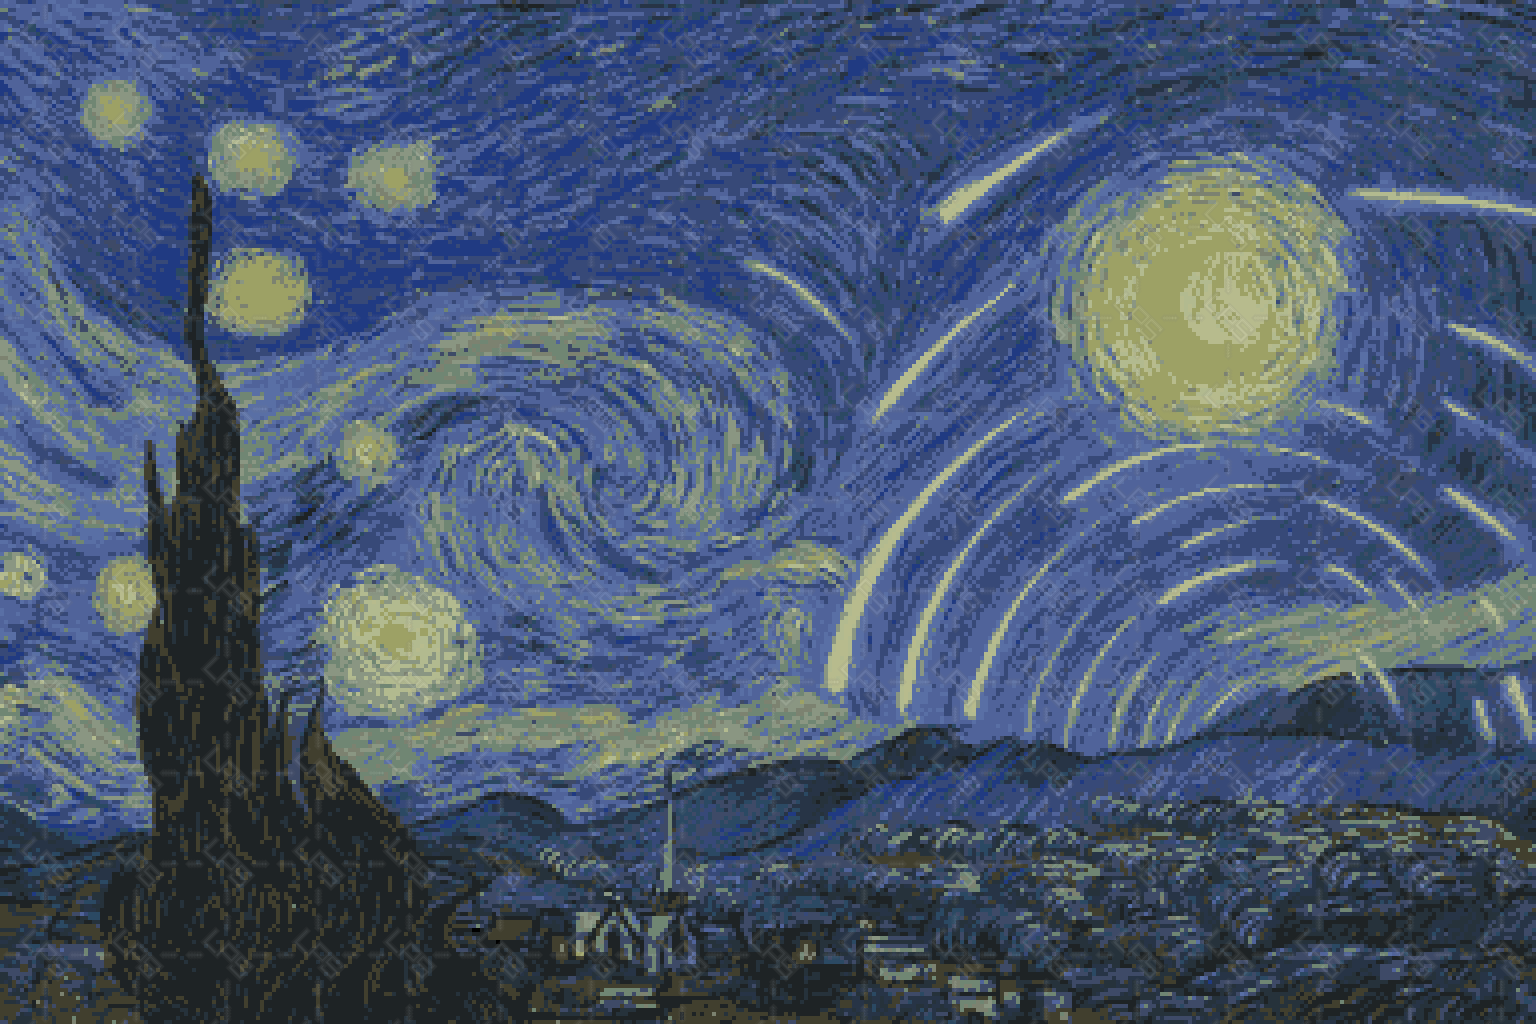
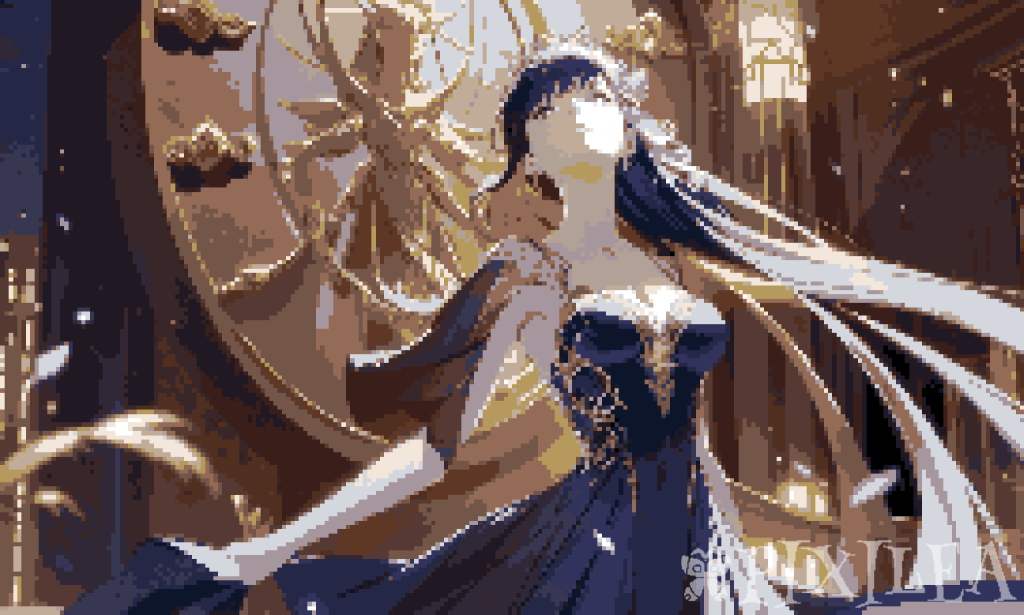
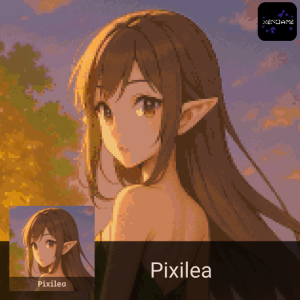
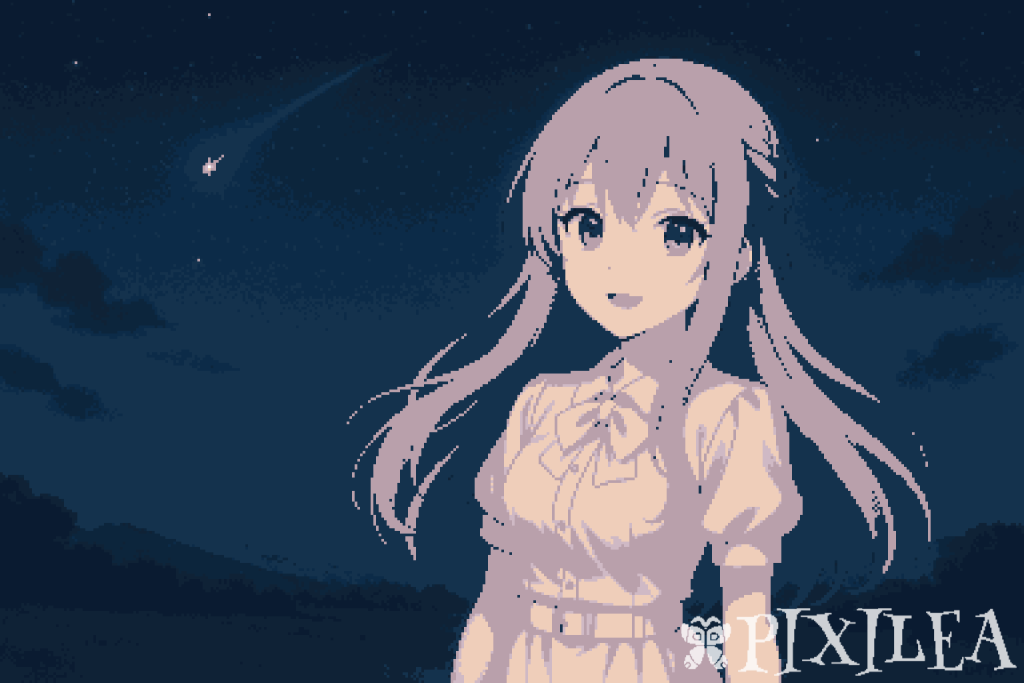
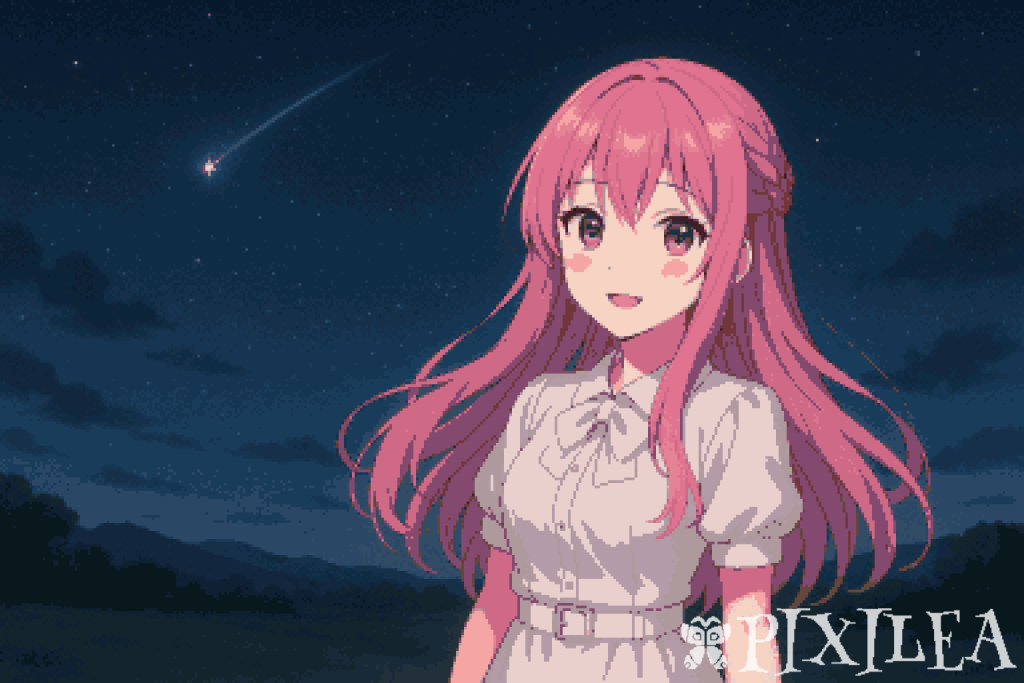
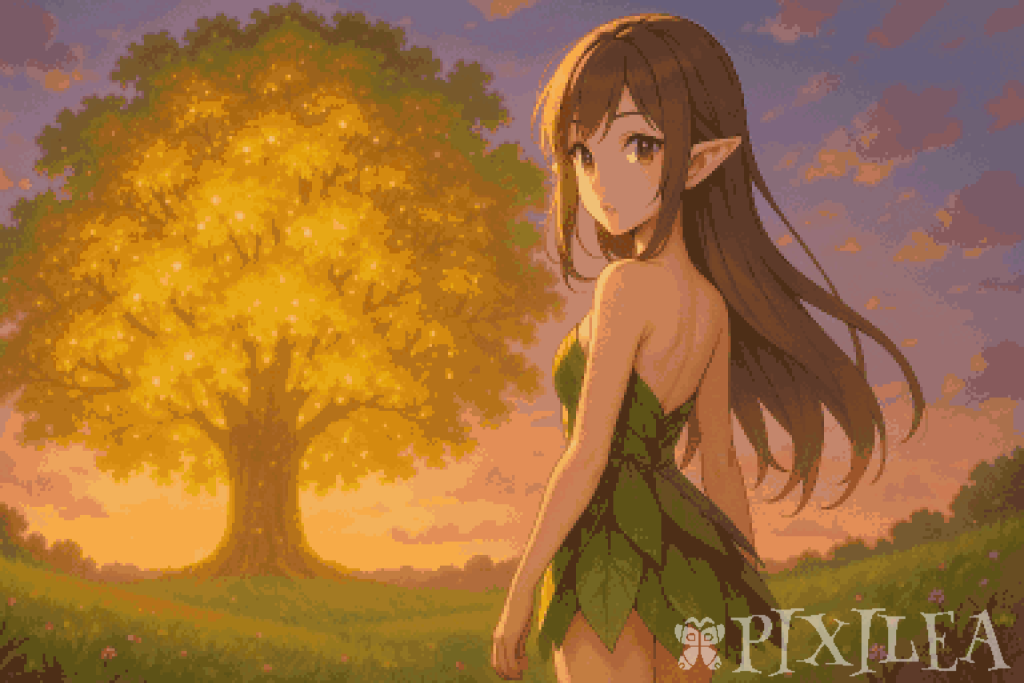
Pixelator transforms your images into beautifully styled pixel art with a single click. Just upload an image, hit Generate, and receive randomized pixel art variants, each with its own creative flair. Powered by our custom AI model, Pixilea.
LPS Zoom
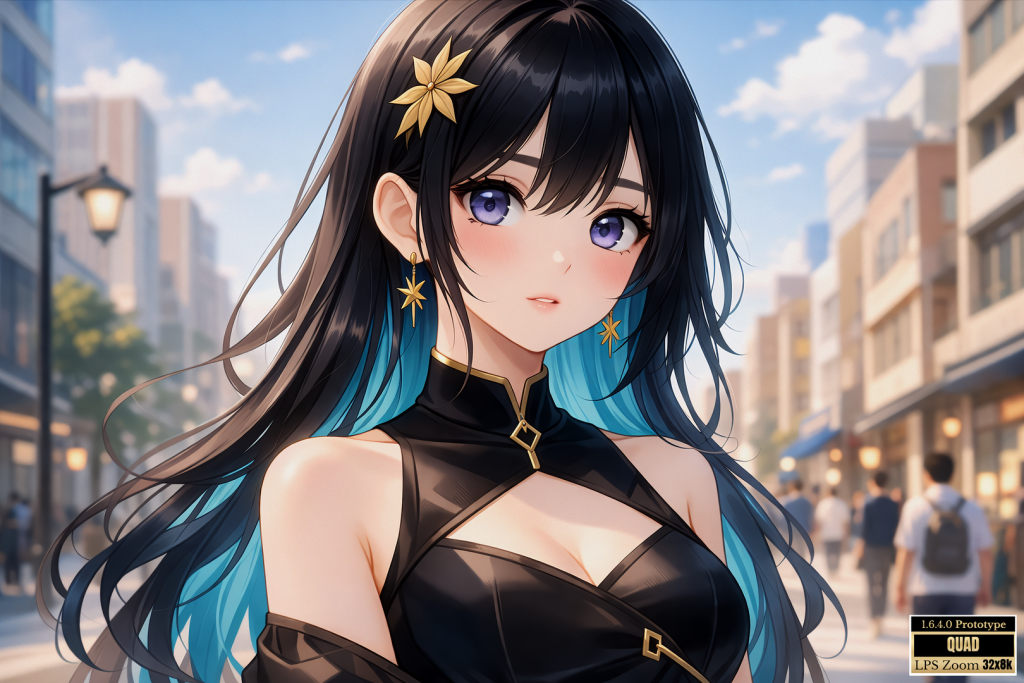
LPS Zoom is a high-precision AI-driven image enhancement and reconstruction module within the Image Enhancer for LPS Editor. It preserves structural accuracy while applying advanced light modeling and sharpness refinement, introducing subtle dimensionality without altering the core composition.
Chromatic Layering
Chromatic Layering is a dedicated feature within LPS Editor that enables advanced, smart blending between layers. Allowing color interaction, depth influence, and compositional adjustments without destructively modifying the artwork. Integrated deeply into the editor’s workflow, it offers an intuitive and flexible way to apply dynamic blend modes that respond intelligently to the layer context.
Whether enhancing lighting, shifting tones, or building depth, Chromatic Layering empowers artists with a non-linear, artist-driven method of visual refinement.
Labrador Palette Retriever
Labrador Palette Retriever is an AI-powered tool that intelligently analyzes your project layers to generate rich, visually appealing, and well-structured color palettes. Whether you’re creating illustrations, game assets, or design projects, it helps you maintain consistent and vibrant colors throughout your work.
With multiple versions available, it adapts to your workflow from rapid previews to highly detailed outputs. All driven by AI designed to suit different creative needs.

Notice
If you are wondering why the button is not functional, it is because LPS Editor is still in development and currently accessible only to a limited group of testers. Once the public release is ready, the button will operate as intended. If you have any questions about the project, feel free to contact me on Discord.
Apprentice
- Free Forever
- No Expiration
- Pixel Perfect
- Up to 64 Pixels Canvas
- Layer Support
- Assisted Drawing
- Virtual Storage

Adept
- 100,000 Bonus Vixel
- No Action Threshold
- No Watermark
- Up to 512 Pixels Canvas
- Layer Support + Chromatic Layers
- AI Tools Access
- Commercial Use
- 512 MB Memory Storage 2.0
- LSG
Master Ticket
- 20% More Bonus Vixel when purchasing 500,000 Vixels or more
- Vixel Discount per Vixel Cost (Up to 100%)
- No Action Threshold
- No Watermark + Custom Watermark
- Up to 1920 Pixels Canvas
- Layer Support + Advance Chromatic Layers
- Upgraded AI Tools Access
- Commercial Use
- 1 GB Memory Storage 2.0
- LSG
Full Features
| Program | Apprentice | Adept | Master |
|---|---|---|---|
| Price | Free Forever | ? | - |
| Usage | Online | Online | Online |
| Platform | Windows | Windows | Windows |
| No Expiration | ✓ | ✓ | ✓ |
| No Subscription | ✓ | ✓ | ✗ |
| No Action Threshold | ✗ | ✓ | ✓ |
| No Watermark | ✗ | ✓ | ✓ |
| Pixelator | ✗ | ✓ | ✓ |
| Buffer | ✓ | ✓ | ✓ |
| Layer Support | ✓ | ✓ | ✓ |
| Chromatic Layers | ✗ | ✓ | ✓ |
| Transparency Support | ✓ | ✓ | ✓ |
| Virtual Storage Access | ✓ | ✓ | ✓ |
| Discord Rich Presence | ✗ | ✓ | ✓ |
| Assisted Drawing | ✓ | ✓ | ✓ |
| AI Tool Access | ✗ | ✓ | ✓ |
| Create palette from Project | ✗ | ✓ | ✓ |
| Export | ✓ | ✓ | ✓ |
| Save | ✗ | ✓ | ✓ |
Pixelator
| Features | Apprentice | Adept | Master |
|---|---|---|---|
| Guidance | ✗ | ✓ | ✓ |
| Sampling | ✗ | ✓ | ✓ |
| Sensitivity | ✗ | ✓ | ✓ |
| M.Decoder - Memory Flash (Dev) | ✗ | ✗ | ✗ |
| M.Decoder - Memory Storage | ✗ | ✓ | ✓ |
| M.Decoder - Memory Disk | ✗ | ✗ | ✓ |
| Neural Noise - Image Noise | ✗ | ✓ | ✓ |
| Neural Noise - Smart Fast Noise | ✗ | ✗ | ✓ |
| Neural Noise - Smart Focus Noise | ✗ | ✗ | ✓ |
| Neural Noise Strength | ✗ | ✗ | ✓ |
| Noise Control - NNRMLCM | ✗ | ✗ | ✓ |
| Noise Control - NNRMLCM: Craft | ✗ | ✗ | ✓ |
| Noise Control - NADPTCM | ✗ | ✓ | ✓ |
| Noise Control - NADPTCM: Craft | ✗ | ✗ | ✓ |
| Noise Control - NADPTCM: Hazzle | ✗ | ✗ | ✓ |
| Noise Control - NADPTCM - Soft | ✗ | ✗ | ✓ |
| Noise Control - NLDGCM | ✗ | ✗ | ✓ |
| Noise Control - NLDGCM: Craft | ✗ | ✗ | ✓ |
| Noise Control Strength | ✗ | ✗ | ✓ |
Pixilea
| Models | Apprentice | Adept | Master |
|---|---|---|---|
| Pixilea Pixelization 1.0 - Achromatic | ✗ | ✓ | ✓ |
| Pixilea Pixelization 1.0 - Core | ✗ | ✓ | ✓ |
| Pixilea Pixelization 1.0 - Refined | ✗ | ✓ | ✓ |
| Pixilea Pixelization 1.0 - Curated | ✗ | ✗ | ✓ |
| Pixilea Pixelization 1.0 - Full | ✗ | ✗ | ✓ |
| Pixilea Pixelization PX 1.0 - Achromatic | ✗ | ✗ | ✓ |
| Pixilea Pixelization PX 1.0 - Core | ✗ | ✗ | ✓ |
| Pixilea Pixelization PX 1.0 - Refined | ✗ | ✗ | ✓ |
| Pixilea Pixelization PX 1.0 - Curated | ✗ | ✗ | ✓ |
| Pixilea Pixelization PX 1.0 - Full | ✗ | ✗ | ✓ |
| Pixilea Pixelization 2.0 - Full | ✗ | ✗ | ✓ |
| Pixilea Pixelization PX 2.0 - Achromatic | ✗ | ✗ | ✓ |
| Pixilea Pixelization PX 2.0 - Core | ✗ | ✗ | ✓ |
| Pixilea Pixelization PX 2.0 - Refined | ✗ | ✗ | ✓ |
| Pixilea Pixelization PX 2.0 - Curated | ✗ | ✗ | ✓ |
| Pixilea Pixelization PX 2.0 - Full | ✗ | ✗ | ✓ |
| Pixilea Visualization - 1.0 - Full (Dev) | ✗ | ✗ | ✗ |
LPS Zoom
| EGUs | Apprentice | Adept | Master |
|---|---|---|---|
| LPS Zoom 32x8k Quad 1640 Prototype 6 GB | ✗ | ✓ | ✓ |
Chromatic Layer
| Features | Apprentice | Adept | Master |
|---|---|---|---|
| Chromatic Type - Global | ✗ | ✓ | ✓ |
| Chromatic Type - Selected | ✗ | ✓ | ✓ |
| Blend Mode - Addition | ✗ | ✓ | ✓ |
| Blend Mode - Burn | ✗ | ✓ | ✓ |
| Blend Mode - Color | ✗ | ✓ | ✓ |
| Blend Mode - Color Dodge | ✗ | ✓ | ✓ |
| Blend Mode - Darken | ✗ | ✓ | ✓ |
| Blend Mode - Divide | ✗ | ✓ | ✓ |
| Blend Mode - Erase | ✗ | ✓ | ✓ |
| Blend Mode - Lighten | ✗ | ✓ | ✓ |
| Blend Mode - Luminosity | ✗ | ✓ | ✓ |
| Blend Mode - Multiply | ✗ | ✓ | ✓ |
| Blend Mode - Normal | ✗ | ✓ | ✓ |
| Blend Mode - Overlay | ✗ | ✓ | ✓ |
| Blend Mode - Saturation | ✗ | ✓ | ✓ |
| Blend Mode - Screen | ✗ | ✓ | ✓ |
| Blend Mode - Soft Light | ✗ | ✓ | ✓ |
| Control Types - Auto | ✗ | ✗ | ✓ |
| Control Types - Color | ✗ | ✓ | ✓ |
| Control Types - Noise | ✗ | ✓ | ✓ |
| Control Types - Area | ✗ | ✗ | ✓ |
| Control Types - Texture | ✗ | ✗ | ✓ |
LSG
| Features | Apprentice | Adept | Master |
|---|---|---|---|
| Settings - Index | ✗ | ✓ | ✓ |
| Settings - Shadow Intensity | ✗ | ✓ | ✓ |
| Setting - Light Intensity | ✗ | ✓ | ✓ |
| Tools - Pencil Shader | ✗ | ✓ | ✓ |
| Tools - Shader Eraser | ✗ | ✓ | ✓ |
| Tools - Shader Bucket | ✗ | ✓ | ✓ |
| Misc - Resamples | ✗ | ✓ | ✓ |
| Misc - Bake | ✗ | ✓ | ✓ |
What is Pixelator?
Pixelator transforms your images into beautifully styled pixel art with a single click. Just upload an image, hit Generate, and receive randomized pixel art variants, each with its own creative flair. Powered by our custom AI model, Pixilea.
Vixel-Based Generation
Each generation costs vixels, adding value to every result. Use your vixels wisely to explore different pixel art styles.
Recommended Canvas Size
You can choose any canvas size, but for clear and high-quality results, we recommend using at least 128×128 pixels or higher.
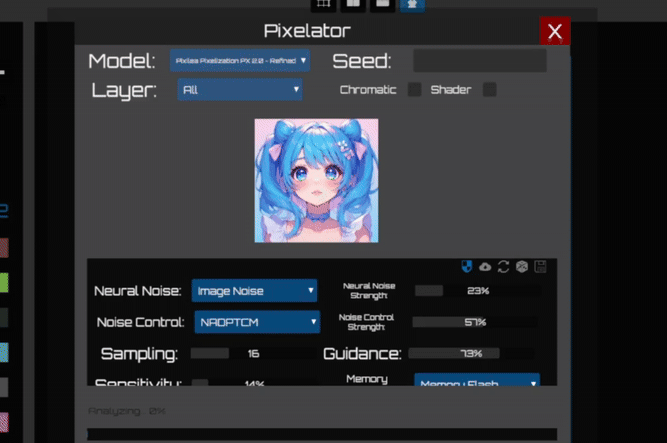
Settings
Neural Noise
Neural Noise should only be used when heavy artifacting is present, as enabling it increases the vixel cost per generation. You can safely adjust Neural Noise settings without altering the pixel-art style by enabling Style Preservation.


When using the image as a noise, there may be hidden artifacts that are not visible to the human eye. During AI processing, these artifacts can be amplified and reproduced because they already exist in the original image. This behavior occurs only when using certain Noise Control methods.
Using NADPTCM reduces these artifacts, but it introduces blurry pixels in the output. If the goal is to have sharpness, other Noise Control methods must be selected. While this removes blurriness, it can result in a significant increase in visible artifacts.
This is where Neural Noise processing becomes necessary. Neural Noise methods make Pixilea to reconstruct the image based on its internal visual interpretation while attempting to preserve the original structure as closely as possible. Neural Noise can significantly reduce or nearly eliminate artifacts without compromising the pixel-art style.
Neural Noise Strength
This option is only enabled when the Neural Noise methods is used. Selecting Image Noise will automatically disable this option.
The Neutral Noise Strength controls how the image is reconstructed during processing.
Noise Control


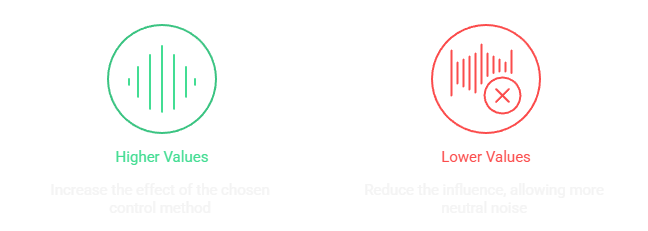
This parameter governs how the generated noise is reconstructed during processing. Different noise control methods can significantly affect the structure, distribution, and characteristics of the noise itself, altering how it behaves in subsequent processing or in combination with other operations. Selecting the appropriate method allows precise control over the noise’s pattern, texture, and overall behavior.
Noise Control Strength
This setting determines how strongly the selected Noise Control Method influences the generated noise during processing.
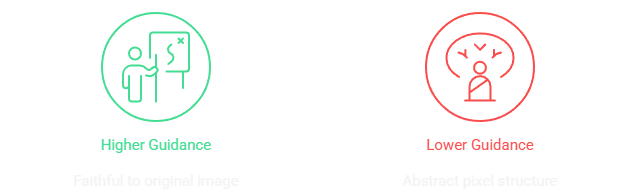
Guidance
The Guidance settings lets you control how closely the pixel art matches the original image
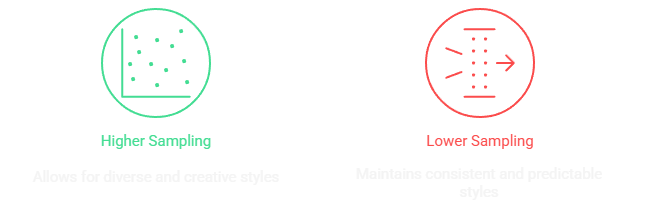
Sampling
The Sampling setting determines how broad the pool of styles is when generating an image into pixel art.
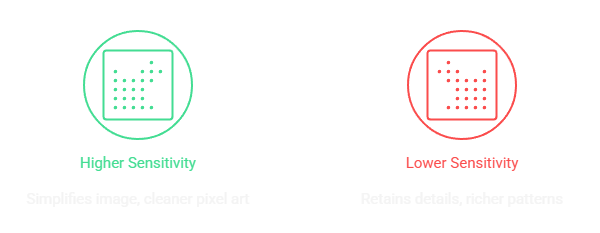
Sensitivity
The Sensitivity setting controls how much fine detail from your original image influences the pixel art conversion
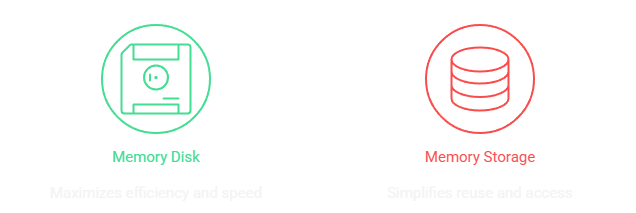
M. Decoder (Memory Decoder)
Users must regularly clean and manage stored memories, as excessive accumulation can consume limited storage, slow down generation speed, and eventually prevent the creation of new outputs.
The M. Decoder setting controls how memory data is decoded and managed during the pixel art generation process. This directly affects how outputs are stored and retrieved, balancing generation speed with flexibility for future use.
Overview
The Store is the dedicated section within the application where users can acquire resources that enhance their overall experience. It is designed to provide a seamless purchasing process, giving users the flexibility to choose how they wish to unlock additional features or extend the capabilities of the application according to their needs.

Items
Vixels
Vixel is a digital currency used to pay for premium tools, AI features, or specialized content. Users can maintain a balance of Vixels and spend them as needed. Vixels do not expire, offering complete flexibility for future use.
Master Ticket
A Master Ticket grants immediate access to advanced tools and AI capabilities for a duration of 24 hours per ticket. Each ticket activates automatically at the moment of purchase and runs continuously. For example, purchasing 7 Master Tickets results in 7 consecutive days of advanced access, as each ticket accounts for a 24-hour period from the time of purchase.
Overview
The Export Window provides a comprehensive interface that allows users to configure the output location, file naming, format, watermark preferences, and enhancement settings for image exports, ensuring complete control over the quality and appearance of the final exported files.
License
All exported files are subject to the applicable license terms. You can review the license here: View License.

Settings
Location
The Location field specifies the directory path where the exported image file will be saved.
Name
The Name field sets the base filename for the exported image, automatically appending the correct extension based on the chosen format.
Format
The Format option allows the user to select whether the image will be exported as a JPEG, JPG, or PNG file.
Watermark
Did you know?
Exporting images with the “Default” watermark grants you a discount on every export. no matter your tier. And the best part? Higher tiers unlock even larger discounts!
The Watermark setting lets the user apply no watermark, use the software’s default watermark, or define a custom watermark configuration.
Enhance
The Enhance option enables either no enhancement or the use of LPS Zoom.
Watermark Settings
Type
The Watermark Setting: Type specifies whether the custom watermark will be applied as a flatten overlay, a repeating pattern, or a single stamp in a corner.
Transparency
The Transparency control adjusts the opacity level of the custom watermark to make it more or less visible against the image.
Size
The Size setting is shown when using either the Pattern or Stamp watermark type, adjusting the scale of the pattern tiles or the watermark stamp depending on which type is selected.
Rotation
The Rotation setting rotates each pattern tile by a specified degree for customized orientation. Available for Pattern
Position
The Position option designates which corner. upper left, upper right, bottom left, or bottom right. the watermark stamp will be placed in.
Offset X
The Offset X field allows fine adjustments to move the stamp horizontally from its selected corner position when using the Stamp watermark type.
Offset Y
Offset Y field allows fine adjustments to move the stamp vertically from its selected corner position when using the Stamp watermark type.
- News
- Blogs
- FAQ
EGU Overview EGU (Enhanced Graphical Upscaler) is a system designed to upscale images while maintaining controlled and predictable resolution output. Unlike a standard upscaler, EGU is a proprietary system that contains AI Models, Parameters and Advanced Systems. Pixel Processor Overview The Pixel Processor is a crucial setting in an Enhanced Graphical Upscaler (EGU) that controls […]
LPS Zoom 16 & 32 Quad Version Overview We are excited to introduce the LPS Zoom 32x8k Quad 1640 Prototype, a studio quality EGU. The EGU replaces our standard Image Enhancers and represents a major step forward compared to the standard models in both quality and performance. The LPS Zoom 32x8k Quad 1640 Prototype includes […]
Note The alpha version of LPS Editor is nearing completion and will soon transition to the beta phase Version Target: Lab Pixel Sprite Editor (L.P.S) Version: LPS v26.01.07 Alpha Known Issue No Report During This Period New User can now include or exclude layer on render Added Reset Settings in Configure LPS Editor Added Clear […]
Version Target: Lab Pixel Sprite Editor (L.P.S) Version: LPS v25.12.28 Alpha Known Issue LPS Zoom produces suboptimal results on low-resolution images. Unchecking a chromatic layer doesn’t deactivate it Improvement Note LPS Zoom Storage 2.0 is more faster and efficient than LPS Zoom Storage 1.0 and LPS Zoom Disk 1.0 LPS Zoom Storage 1.0 have been […]
Version Target: Lab Pixel Sprite Editor (L.P.S) Version: LPS v25.12.14 Alpha Known Issue LPS Zoom produces suboptimal results on low-resolution images.. Unchecking a chromatic layer doesn’t deactivate it When exporting, the image file will be shown but closing it will not exit the program but hide it New Pixilea – Added Pixel Smoothing Pixilea – […]
Version Target: Lab Pixel Sprite (L.P.S) Version: LPS v25.11.14 Alpha Early Access LPS Editor launched a limited testing phase on November 14, 2025. Access is currently restricted to a small group of testers while we refine features and stability ahead of the public release. We also opened a presence on Fiverr to evaluate real-world content […]
EGU Overview EGU (Enhanced Graphical Upscaler) is a system designed to upscale images while maintaining controlled and predictable resolution output. Unlike a standard upscaler, EGU is a proprietary system that contains AI Models, Parameters and Advanced Systems. Pixel Processor Overview The Pixel Processor is a crucial setting in an Enhanced Graphical Upscaler (EGU) that controls […]
LPS Zoom 16 & 32 Quad Version Overview We are excited to introduce the LPS Zoom 32x8k Quad 1640 Prototype, a studio quality EGU. The EGU replaces our standard Image Enhancers and represents a major step forward compared to the standard models in both quality and performance. The LPS Zoom 32x8k Quad 1640 Prototype includes […]
Pixilea Versions Overview Pixilea is available in multiple versions, each designed to support different creative workflows and performance requirements. These versions determine how pixel art is generated, how inputs are processed, and how much creative flexibility is available to the user. Pixilea Pixelization Pixilea Pixelization is designed to transform an artwork or an image into […]
Xenoame Laboratory Overview The mission of Xenoame Laboratory is to empower Xenoame and its creators by streamlining development processes and reducing operational workload through the use of Xelab AI. By providing advanced, automated, and procedural AI and Non-AI driven solutions, Xenoame Laboratory aims to enhance productivity, accelerate creative workflows, and enable the organization to focus […]
How to get early access?
Early access users are selected exclusively by our team. Applications are not accepted, as early access builds may contain security vulnerabilities. Access is strictly limited to a controlled group of users.
When LPS Editor will be released?
LPS Editor will be released once it is fully ready for consumers. We are actively finalizing development and aim to launch it within this year, provided everything goes smoothly.
Why I am having different result or even worst result when using Pixelator?
Poor results generated by Pixelator can be caused by multiple factors:
- Lower-tier accounts have limitations that directly affect generation quality. Higher tiers provide access to improved performance and better output consistency.
- Some models are not designed to handle highly complex images. Using a higher or alternative model is recommended. Based on internal testing, extremely complex images may fail in PX models but may perform better when processed with compressed models such as non-PX models, even though non-PX models are smaller in size compared to PX models. This can go vice-versa.
- Low-resolution input images can significantly reduce output quality. Higher-resolution images generally produce more accurate and detailed results.
- Optimal results require manual adjustment of settings. Users are encouraged to experiment with different configurations. This design choice is intentional, as it allows each user to develop a unique visual style when using Pixelator.
- Blurry or unfocused images reduce the model’s ability to accurately interpret details, leading to poorer results. To mitigate this issue, export the image using LPS Zoom and use the resulting image as the layer for generation, as this improves clarity and preserves important visual details.
There are additional factors that may influence output quality that are not listed here. However, the points above represent the most common and impactful causes.
Can I get ban?
When I open image why its so pixelated?
Your account tier directly affects how images are processed LPS Editor. To avoid confusion, the tiers are summarized below:
Apprentice Tier: This tier is designed to provide free access to LPS Editor. Users are limited to creating pixel art only, with no support for heavy artistic workflows or access to Xelab AI features.
Adept Tier: This tier provides access to LPS Editor through a one-time payment. Users gain limited access to basic Xelab AI features, including the ability to use Pixelator and LPS Zoom with selected models. Output quality typically ranges from low to mid quality, with occasional high-quality results depending on usage and settings. Pixel art creation is supported at low to mid complexity, while complex artwork remains constrained due to tier limitations.
Master Tier: This tier grants access to advanced Xelab AI features within LPS Editor for a limited duration. Usage time depends on the number of Master Tickets available. Users can generate and export high-quality, print-ready images. While pixel art remains the primary focus, this tier also allows a higher likelihood of producing complex artwork compared to lower tiers.
Can I sell or use the images I created in LPS Editor in Commercial purposes?
Check Term and Conditions: Click here
What if my generation failed?
Your Vixels will be refunded if the system successfully detects the issue. If the system fails to detect it, a refund cannot be guaranteed. To reduce the risk of non-refundable cases, please report the issue as early as possible. Early reports help us improve detection, and in future occurrences, this increases the likelihood that affected Vixels will be refunded.
How to create an account?
You can create an account using the Xenoame Launcher when LPS Editor is launched, specifically for early access users. An account will be provided, but it will be disabled once LPS Editor is officially released. Please avoid overspending with your early access account, as any currencies earned are non-transferable.
Why I can't save my settings?
If you are in Session Mode, which is the default startup for the Apprentice tier, you cannot save your settings directly. To preserve your settings, you must create a document instead.
Why my generated images not save directly to my drive instead of Virtual storage?
All creations in LPS Editor are saved to Virtual Storage rather than directly to your drive. This approach helps keep your files organized and prevents them from being scattered across your system.
Why we need virtual storage? Can I use my drive instead?
Virtual Storage is designed to organize all images, projects, data files, and other assets within LPS Editor itself, providing a centralized and manageable workspace.
What is different between Rental items and items I owned?
Rental items are temporary assets provided when you purchase a qualifying special item. They are not permanent and may be modified or removed during updates. If the associated special item is removed, the rental item may also disappear. Rental items may not appear in your inventory immediately, as the system requires verification of your special item. Using rental items may consume credits, and commercial use is subject to both the editor license and the terms of the special item that grants access.
Original items are assets you fully own. They do not incur usage charges, although some editors may implement separate credit systems for certain content even if your item is free. Original items always appear in your inventory and may be used commercially subject only to the editor’s license.
- EGU
- Pixilea
- Chromatic Layering
- LSG
- Labrador Palette Retriever
- Virtual Storage
What is EGU?
EGU (Enhanced Graphical Upscaler) is a system designed to upscale images while maintaining controlled and predictable resolution output. Unlike a standard upscaler, EGU is a proprietary system that contains AI Models, Parameters and Advanced Systems. more…
Vixel-Based Generation
Warning
Images exported with this model are not saved in the editor’s memory. Ensure you keep proper backups, as once exported, these files exist only on your virtual pc workspace.
Each generation costs vixels, adding value to every result. Use your vixels wisely to explore different EGUs and achieve the best possible image quality.
LPS 32x8k Quad 1640 Prototype
Recommended Canvas Size
You can choose any canvas size, but for clear and high-quality results, we recommend using 512×512 pixels or higher for the Master Tier, and between 256×256 and 512×512 pixels for the Adept Tier, which cannot exceed 512×512 or be lower than 256×256.
Features
Pix P.
Without architectural constraints, the EGU can consume up to 24 GB of VRAM for a single image pass. Through specialized optimizations with Pix P., VRAM usage is dramatically reduced, allowing you to control how much VRAM is used.
Q.T.
Enhances image output by improving internal processing quality, ensuring visuals are sharper, cleaner, and more detailed without directly scaling resolution. By adjusting Q.T., the model optimizes image quality for a target resolution, producing results with better-defined edges, richer textures, and more stable details, rather than simply enlarging the image. Unlike Magnification, which is resolution-driven, Q.T. is quality-driven, focusing on maximizing the fidelity of the output for any chosen size.
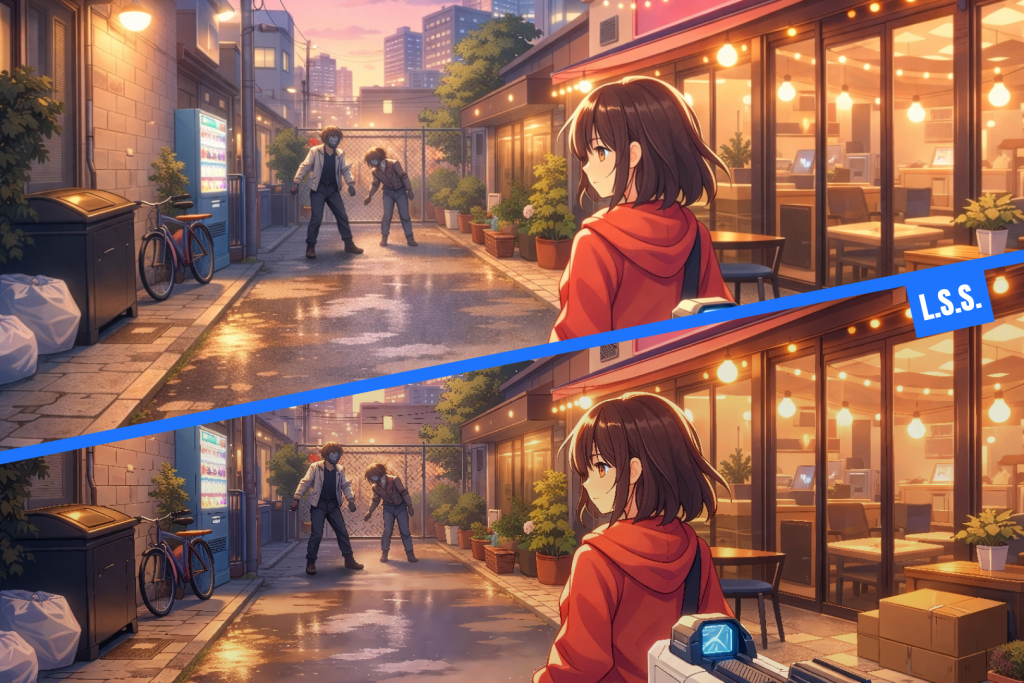
L.S.S.
Elevate your anime artwork with LSS. Advanced light and shadow simulation enhances colors, visual depth, and atmosphere, giving your images a polished, professional look with smooth shading and dynamic lighting.
High-resolution staged processing
LPS Zoom EGUs can process images and videos up to 8K resolution while keeping VRAM usage minimal.
eVRM
Under heavy load, the EGUs utilize their built-in eV.R.M. to efficiently manage high-resolution processing, ensuring smooth, stable results without overloading system resources. This allows for detailed, crisp outputs even at extreme resolutions, with optimized performance across every stage of the content.
Depth establishment
Carefully models spatial hierarchies, introducing subtle dimensional layering without disrupting the original structure.
LPS Zoom 32x8k Quad 1640 Prototype
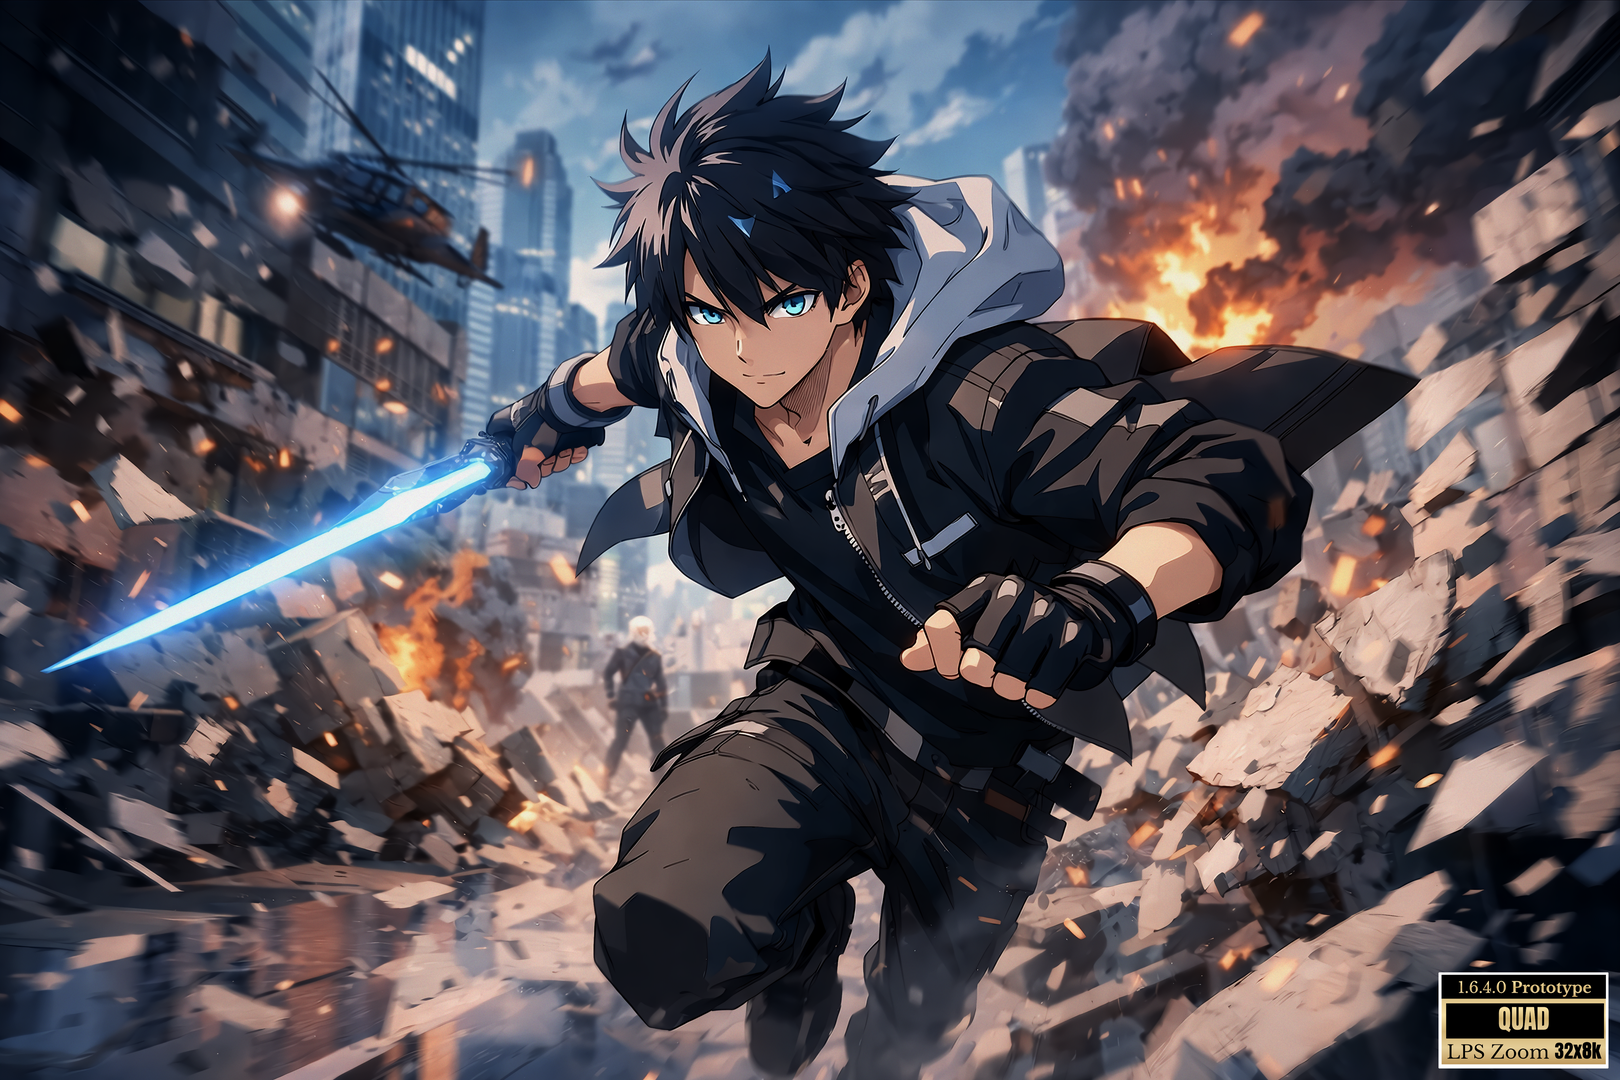
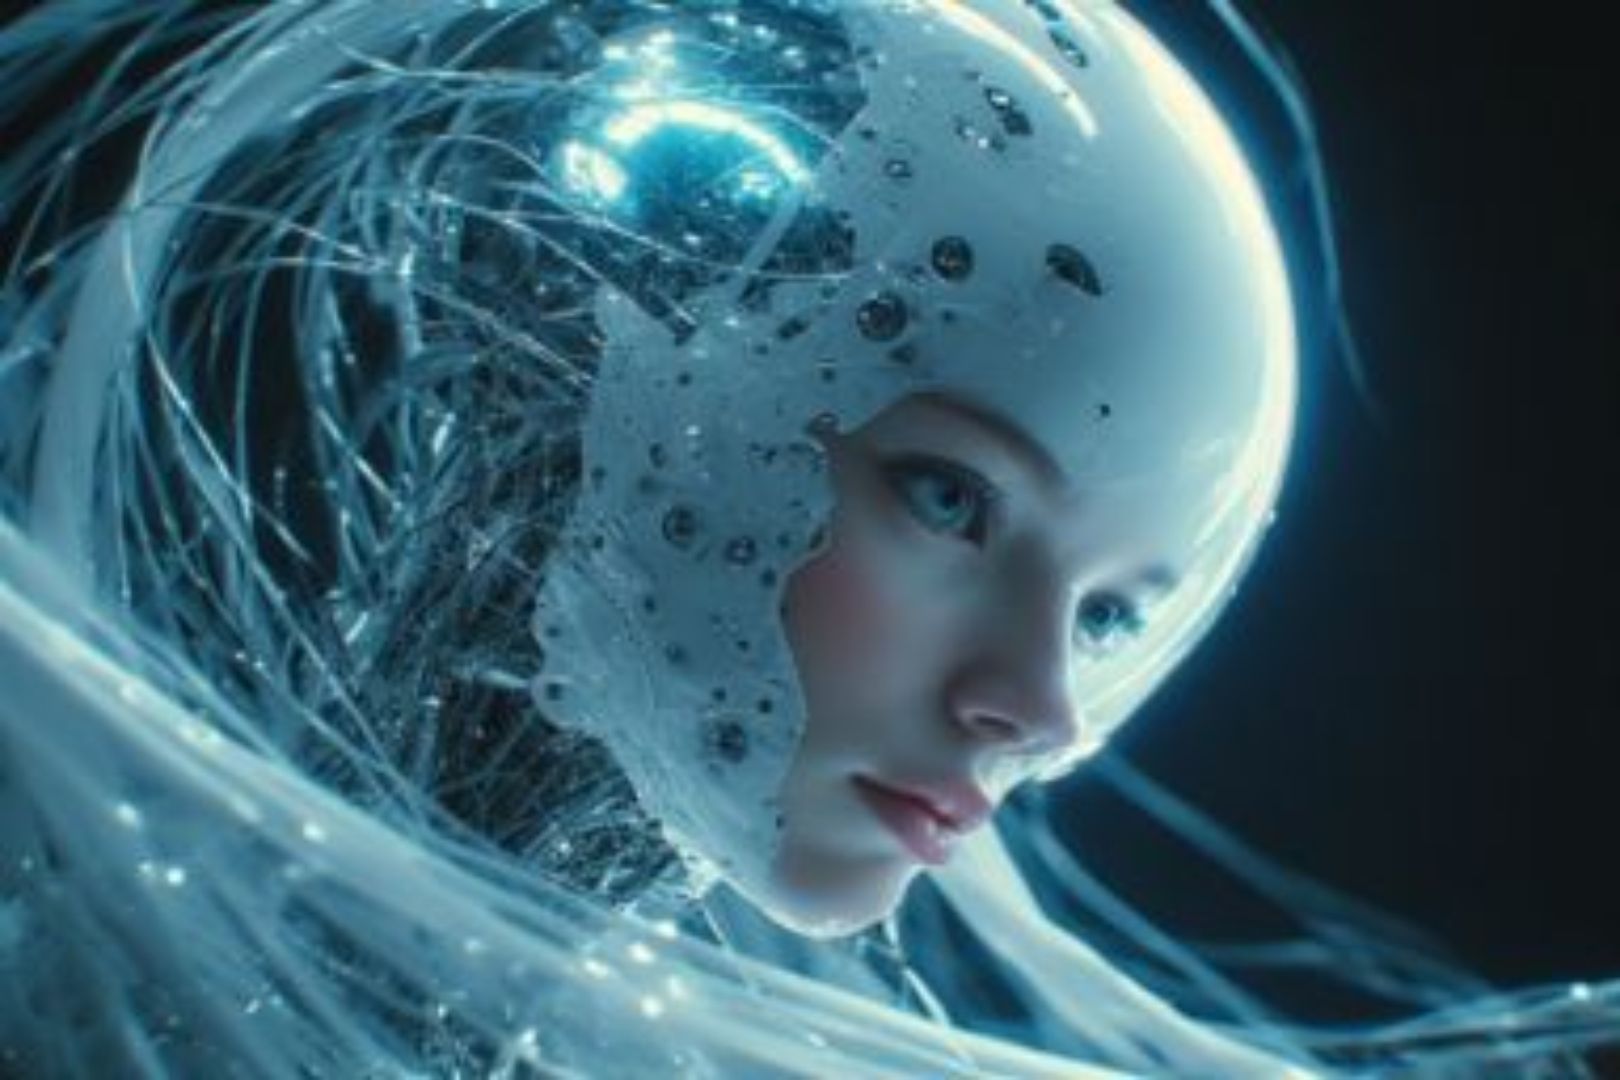
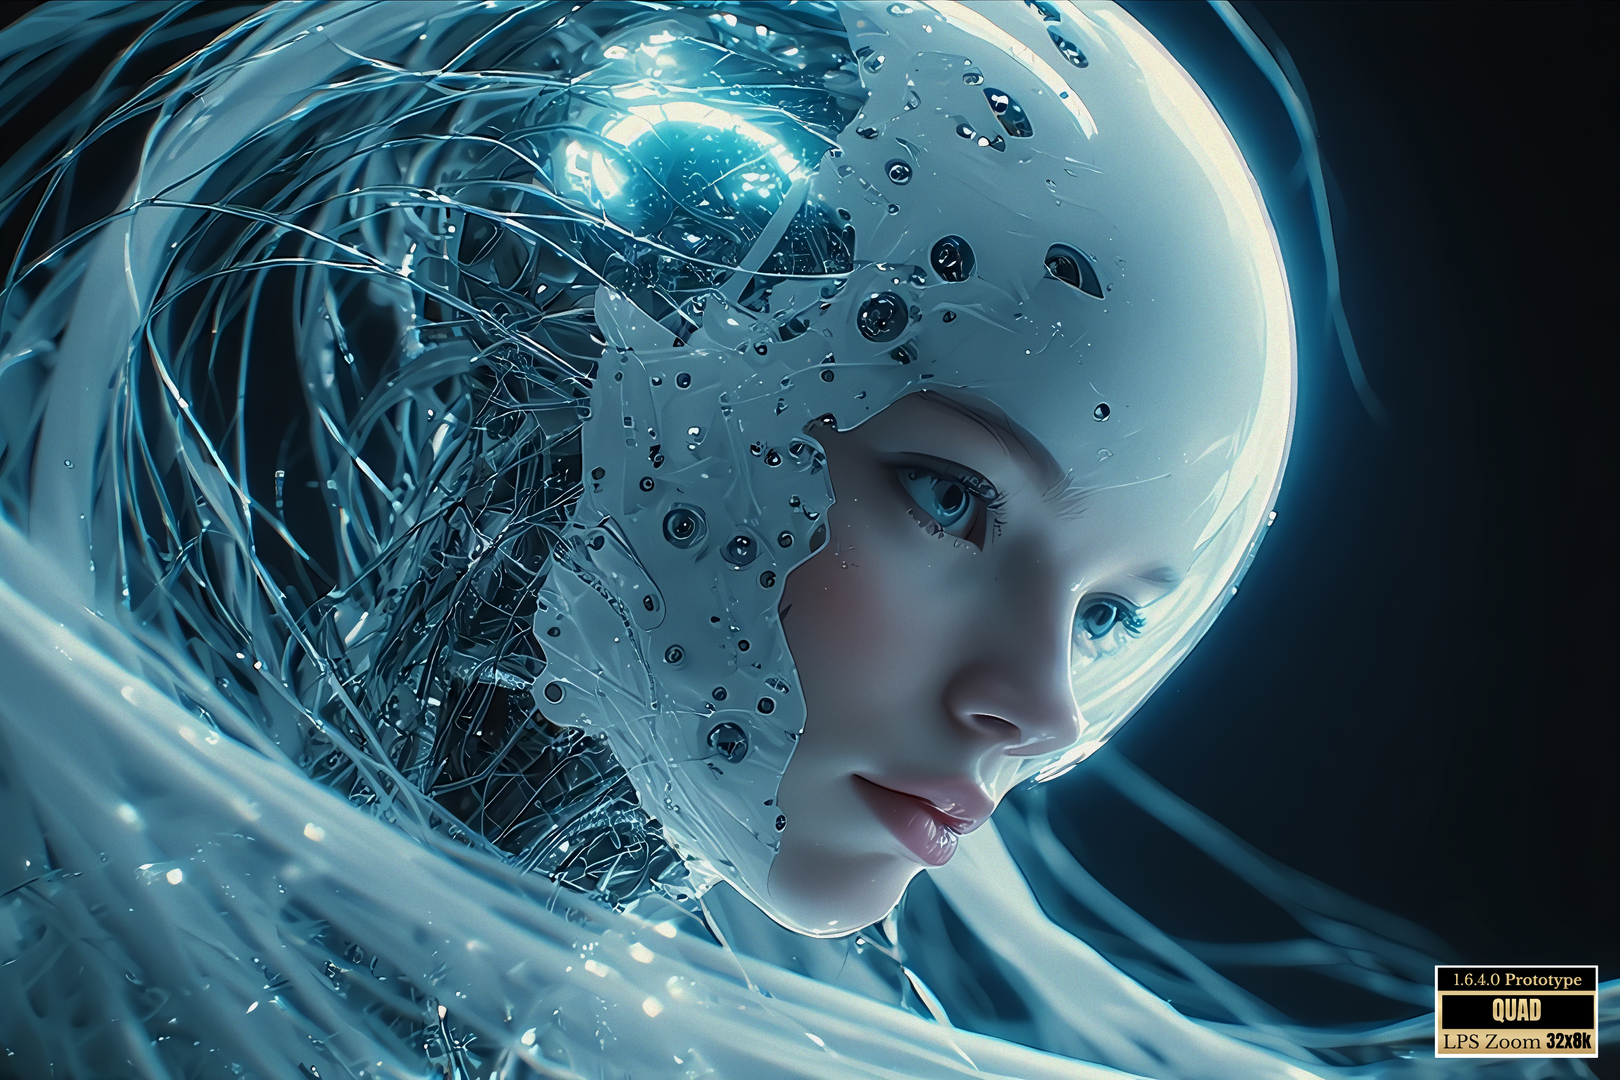

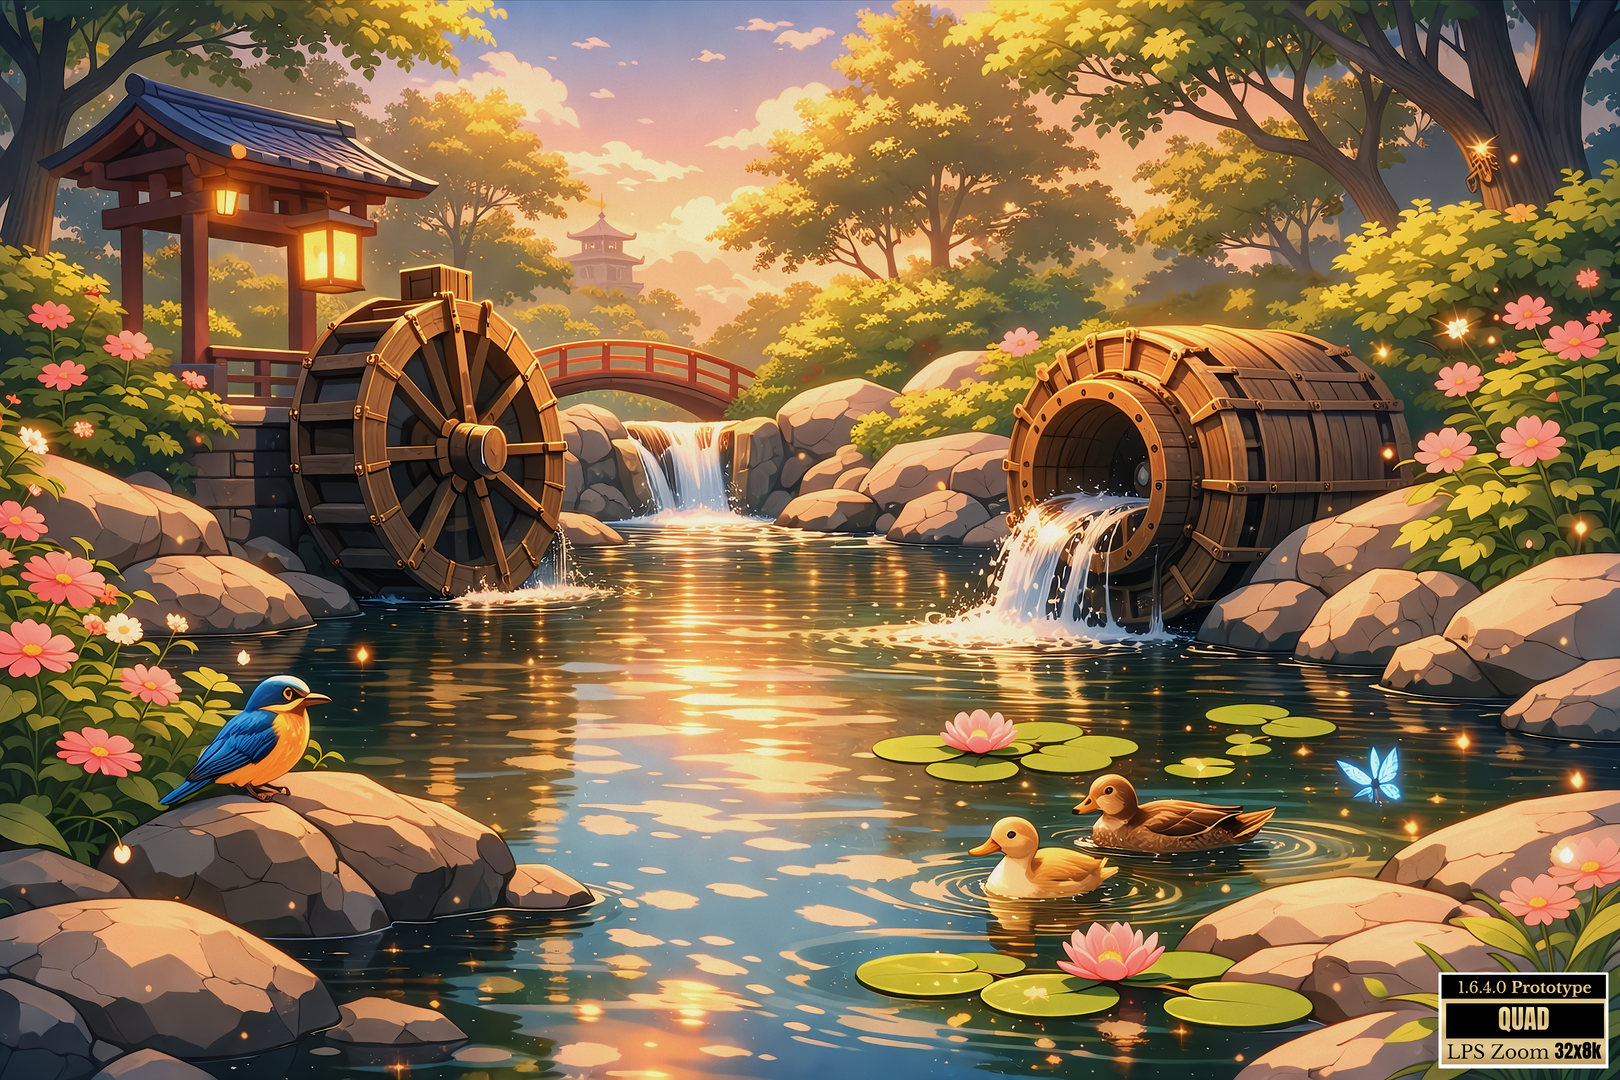
Reveals subtle textures and refines edges to bring out intricate details.
Recommended
Vram Recommended
The Adept Tier is designed to operate with approximately 4GB of VRAM, while the Master Tier requires around 6GB of VRAM to handle more advanced processing demands.
Ram Recommended
The Adept Tier requires 8GB of RAM, whereas the Master Tier demands 16GB of RAM to fully support intensive editing workflows.
What makes EGU stand out?
| Features | Enhanced Graphical Upscaler | AI Upscaler |
|---|---|---|
|
VRam Control |
✅ Controls VRAM usage to optimize EGU performance. |
❌ No VRAM control |
|
Set a resolution and adjust the quality |
✅ Quality tuning that improves output quality at a target resolution. |
❌ Fixed quality scaling tied only to resolution. |
|
Batch Processing |
✅ Built for large and continuous workloads with stable performance and fewer failures. |
❌ Designed for quick tasks but performance degrades on large or long running jobs. |
|
Cinamatic |
✅ Simulate realistic lighting and shadow effects in your image to achieve a cinematic appearance. Advanced versions of LSS include a ‘Stabilizer’ feature to prevent overshooting during the simulation. |
❌ Just base on your original image |
|
Image and Video High Resolution Output |
✅ It is designed to handle high resolution images, supporting output up to 8K resolution. Even with a minimum of 6 GB of VRAM, you can produce 8K images or videos without running out of memory by leveraging VRM. |
⚠️ Supports unlimited image resolutions using a scale-factor-based approach. Note that video processing may trigger out-of-memory errors if VRAM is insufficient. |
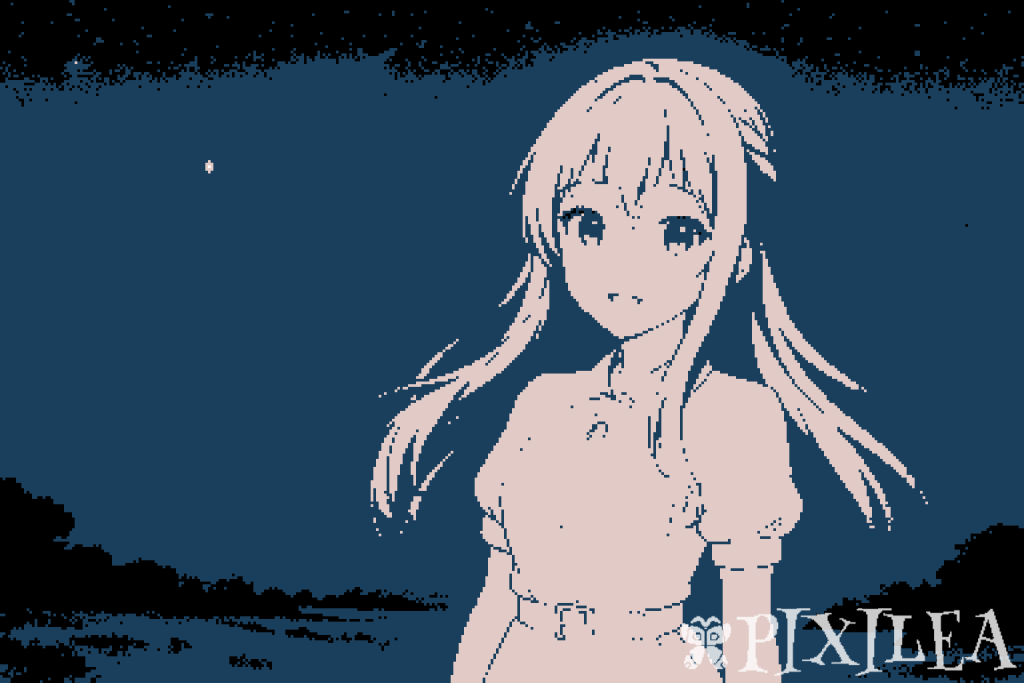
✦ Meet Pixilea
Pixilea is a Xelab AI, the third model categorized as Visual AI developed by Xenoame, following Hinachi Ai and Anme AI. Purpose-built for pixel art transformation, Pixilea is the creative engine behind every generation in Pixelator.
- Reimagines a wide range of images — from original characters to artistic references — into expressive pixel art
- Adapts seamlessly to a range of styles — from minimalist designs to painterly pixel interpretations
- Generates creative variations while preserving structure, form, and pixel integrity
Whether you’re working with personal artwork, stylized concepts, or visual inspiration, Pixilea transforms your input into distinct, stylized pixel art ready for use in your creative projects.
Reimagination is available exclusively in the Visualization version.
Versions
There are 2 unique versions of Pixilea:
Pixelization – transforms images into pixel art
Visualization – generates pixel art from text descriptions
Models
Tip
For best results, ensure that the image resolution is supported by your account tier, then proceed to Pixelator, select your preferred model, and generate your pixel art.


Pixilea Pixelization - Achromatic
Designed to produce striking pixel art with a refined, high-contrast aesthetic. Ideal for creating bold, mood-driven visuals that emphasize form and expression over color. Available to users with the Adept tier.
Pixilea Pixelization - Core

Crafted to produce versatile pixel art with balanced color and sharp detail, well-suited for a wide range of styles and themes, from characters to dynamic environments. Available to users with the Adept tier.
Pixilea Pixelization - Refined

Engineered to create pixel art with enhanced color richness and subtle, polished detailing, making it ideal for expressive characters and scenes that demand a gentle, luminous touch. Available to users with the Adept tier.
Pixilea Pixelization - Curated
Designed to deliver pixel art with heightened vibrancy, sharper detailing, and well-balanced shading. This model produces a clear, expressive presentation suitable for atmospheric scenes and polished visual styles. Available to users with the Master tier.
Pixilea Pixelization - Full
A premium model built to produce pixel art with outstanding precision, vibrant colors, and intricate detail, perfect for scenes that demand maximum visual impact and artistic depth. Available to users with the Master tier.
What is Chromatic Layering?
Chromatic Layering is a dedicated feature within LPS Editor that enables advanced, smart blending between layers. Allowing color interaction, depth influence, and compositional adjustments without destructively modifying the artwork. Integrated deeply into the editor’s workflow, it offers an intuitive and flexible way to apply dynamic blend modes that respond intelligently to the layer context.
Whether enhancing lighting, shifting tones, or building depth, Chromatic Layering empowers artists with a non-linear, artist-driven method of visual refinement.
Vixel-Based Generation
Each generation costs vixels, adding value to every result. Use your vixels wisely to explore different artistic styles and effects.
Settings
Name
Defines the identifier of the chromatic layer. This helps organize and distinguish layers, especially when working with multiple overlays or complex compositions.
Blend
Specifies the blend mode applied to the layer. Determines how this layer visually interacts with the target layer beneath it.
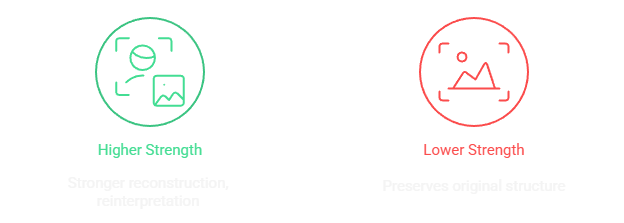
Strength
Controls the degree of influence the chromatic layer has on the target layer. Higher values result in a more dominant effect, while lower values allow the base layer to remain more visible.
Opacity
Adjusts the transparency level of the chromatic layer. This directly affects how visible or subtle the layer appears within the final composition.
Control Types
Control Types define how a chromatic layer’s influence is distributed or modulated across the target layer. Each type provides a unique mechanism for determining where and how the effect is applied, offering a wide range of artistic control.
Chromatic Type
Specifies how a chromatic layer behaves in terms of its scope and influence within the LPS Editor.
Blends
Addition
This mode increases the visual intensity by adding the color values of one layer onto another. It creates a luminous effect, enhancing brightness in overlapping areas and making strong highlights more pronounced.
Burn
Burn deepens tones by pushing color intensity into darker ranges. This produces a more dramatic and moody visual appearance by reducing brightness and emphasizing contrast in overlapping areas.
Color
Color mode modifies the hue and saturation of the underlying layer based on the active layer while keeping its original lightness. It allows for dynamic recoloring without disrupting the structure or luminance of the image.
Color Dodge
Color Dodge brightens areas of the base layer based on the brightness of the layer above it. The result is a glowing, amplified effect that intensifies lighter regions while maintaining contrast and clarity.
Darken
Darken compares both layers pixel by pixel and retains only the darker value. It is useful for building shadows, merging dark elements, or maintaining visual hierarchy through tone reduction.
Divide
Divide creates an abstract and high-contrast result by reducing the base layer’s intensity proportionally to the blend layer. It can introduce stylized or inverted effects and is best used for experimentation or creative distortions.
Erase
This mode removes or suppresses parts of the base layer using the active layer’s content. It serves as a visual masking tool, allowing selective removal of visual elements based on shape, alpha, or color.
Lighten
Lighten evaluates both layers and retains the lighter pixel at each position. This helps to softly expose light features and makes bright accents stand out without overpowering the entire composition.
Luminosity
Luminosity replaces the brightness values of the base layer with those from the active layer while keeping the base layer’s hue and saturation intact. It is useful for introducing light structure or tone shifts without altering color identity.
Multiply
Multiply darkens the image by combining both layers in a way that reduces light and enhances depth. It’s commonly used to apply shading, texture, or low-light adjustments while maintaining color integrity.
Normal
Normal is the default mode where the active layer is simply placed over the base layer according to its opacity. There is no interaction beyond standard transparency blending, making it the most neutral option for stacking.
Overlay
Overlay dynamically adjusts the final output by both darkening and lightening the image based on the brightness of the base. It enhances midtones, sharpens contrast, and results in a rich, high-impact visual finish.
Saturation
Saturation modifies only the vividness of the underlying layer using the saturation level of the active layer. Hue and brightness remain unchanged, allowing users to boost or reduce intensity without affecting form or tone.
Screen
Screen mode lightens the image by combining both layers in a way that reduces dark tones and increases brightness. It’s ideal for soft glows, ambient lighting, or bright overlays without harsh blending edges.
Soft Light
Soft Light introduces gentle lighting variations, subtly adjusting brightness and contrast based on the upper layer. The result mimics a natural diffusion of light, providing polished and atmospheric transitions between tones.
Control Types
Auto
Automatically applies the chromatic effect uniformly across the entire layer. No additional input or condition is required. This is the default behavior for quick application without customization.
Color
Modulates the effect based on color values in the target or reference layer. Regions with matching or similar color profiles will receive stronger influence, allowing for targeted color-based adjustments or enhancements.
Noise
Uses procedural noise patterns to introduce randomized variation across the layer. This results in organic, scattered, or textured blending that feels natural and unpredictable—ideal for grunge, terrain, or atmospheric effects.
Area
Restricts the chromatic influence to a specific region, shape, or user-defined mask. This allows for localized control, making it suitable for highlighting, selective blending, or precision corrections.
Texture
Applies the chromatic effect using a designated texture map as a control source. The brightness or alpha values of the texture define where and how strongly the layer influences the target, allowing for advanced masking, stamping, or pattern-driven blending.
Chromatic Types
Global
Applies chromatic effects to the preview window, which directly influences the final output. However, it does not affect the canvas or modify any underlying layers. This is suitable for global post-processing effects that shape the final look without altering layer data.
Selected
Applies chromatic effects directly to the canvas, targeting specific visual elements. This mode affects only the selected layers, without impacting the preview window or influencing unrelated layers.
What is LSG?
LSG stands for Light Shadow Generator.
It is a software module that automatically produces shadows and lights through color analysis. Users mark or paint the areas intended for shading or lighting, and the tool determines the appropriate color for each marked region. The generation process can be adjusted through Index and Intensity controls, allowing precise refinement of the final result.
Vixel-Based Resample
Each resample costs vixels, so use them strategically during the final stage of your project to avoid overspending and ensure the best possible shading and lighting results.
History
LSG was created by Xeno CX in November 2023 as a private, proprietary tool. In 2025, it was implemented into Oblinesis Engine: Spike Weed, which was later used in LPS Editor to provide a seamless, integrated shading and lighting solution within the editor.
Automation
Resample
The Resample feature automatically processes all marked shadow or light positions and applies the corresponding effect to those areas. Its behavior can be adjusted using the Index and Intensity controls.
Operations
Bake
Baking is the process of permanently applying LSG-generated shadows and lights to your artwork. Once baked, these effects become part of the image and no longer rely on resampling data.
Stop Resample
The Stop function immediately halts the current LSG operation. This is especially useful when handling a large number of queued tasks, as it allows you to cancel the process without applying unnecessary or excessive changes.
Clear All
The Clear All function removes all shadows and lights from the entire artwork or all layers. This is useful when you want to completely reset your project’s effects.
Clear
The Clear feature removes all shadows and lights from the currently selected layer. This allows you to reset effects on a specific layer without affecting other layers.
Settings
Index
Amplifies the effect of the shadow or light color while maintaining its original intensity.
Intensity
Controls how strong or impactful the shadow or light effect appears. Higher intensity results in deeper shadows or brighter highlights.
Tools
Pencil Shader
Manually draws LSG-generated shadow or light effects pixel-by-pixel.
Shader Eraser
Removes existing shadow or light effects without altering the base colors.
Shader Bucket
Fills large connected areas with shadow or light effects in one click.
What is Labrador Palette Retriever?
Labrador Palette Retriever is a xelab model that intelligently analyzes your project layers to generate rich, visually appealing, and well-structured color palettes. Whether you’re creating illustrations, game assets, or design projects, it helps you maintain consistent and vibrant colors throughout your work.
With multiple versions available, it adapts to your workflow from rapid previews to highly detailed outputs. All driven by AI designed to suit different creative needs.
Vixel-Based Generation
Each palette generation uses vixels, making every result valuable. Use your vixels wisely to explore different Labrador versions and settings to achieve the most suitable and visually appealing color palettes for your project.
Versions
Labrador Palette Retriever Mini
Optimized for speed, Mini intelligently groups similar colors together, producing compact palettes in an instant. Perfect for quick iterations, previews, and situations where efficiency is key.
Labrador Palette Retriever
The Standard version intelligently captures colors exactly as they appear across your layers, offering a natural representation of your project’s color usage. It’s the ideal balance of speed and detail for everyday creative work.
Labrador Palette Retriever Omni
The Omni version uses advanced intelligent color separation to highlight a wide variety of distinct tones. This produces palettes with rich diversity, perfect for projects where strong variation is essential.
Settings
Max Sam (Maximum Number of Samples)
This indicates the maximum number of colors that can be generated. However, the actual output may vary, as it depends on how the AI interprets and processes the request
Threshold (Color Threshold)
This indicates how the AI determines the minimum variation allowed between palette colors, expressed as a percentage. Higher values guide the AI to create more distinct differences, while lower values allow closer and more subtle variations.
Warning
Virtual Storage is an experimental feature; files may break or reset during updates.
What Is Virtual Storage?
Virtual Storage is an internal file management system used by the LPS Editor to organize and store both user-created files, generated Pixilea images, editor files or any files that is part of the editor. It is divided into two main storage types: Editor Storage and Memory Storage.
The primary purpose of Virtual Storage is to organize editor related files in a structured and consistent way. This includes managing internal data, user preferences, and user created content that the editor depends on to function correctly.
By centralizing these files, the editor can locate, load, and update data quickly, ensuring smooth operation and predictable behavior.
Performance and Access
Virtual Storage is optimized for fast access within the editor. Files are indexed and managed internally to reduce load times and avoid manual file handling by the user.
All interaction with Virtual Storage happens through the LPS Editor interface, ensuring data integrity and preventing accidental modification or corruption.

Storage Location
Virtual Storage files are stored locally on the user’s device and are managed exclusively by the LPS Editor. These files are not exposed as standard user documents and are accessed only through the editor.
When the LPS Editor is uninstalled or installed on a new computer, Virtual Storage is reset and starts fresh.
Storages
Editor Storages
Editor Storage is used to store files necessary for the editor’s functionality, including custom user saves.
Memory Storage
Memory storage is used to store generated images.